
This post may contain affiliate links and I may earn compensation when you purchase through these links at no additional cost to you. Thank you for the support!
Why do you need restorative yoga in your life?
We ALL need to find a way to relieve our stress. Stress takes an immense toll on our physical bodies, our mental health, and our overall well-being. It creeps into all areas of our life: relationships, work, parenting, sleep, social life, and more. This can affect overall happiness and contentment with life.
A refuge from the daily stresses of life is what we all need. I’m going to share with you a very simple practice that will bring some peace and calm to your life and melt away the stress – restorative yoga!
I have developed a sequence of restorative yoga postures that can provide a respite for you from the stresses of daily life. This practice will calm your nervous system and leave you feeling refreshed, tranquil and peaceful.
What is restorative yoga?
This type of yoga is not a workout, but it is a work-in. We focus on our inner world – create a calm, comfortable place in our bodies through supported asana (poses) and conscious breathing. In this way we can truly surrender, let go of tension and stress in our bodies and minds. It is a deeply relaxing practice that emphasizes the meditative aspect of yoga, joining body and mind.
Restorative yoga is a passive style of yoga that is all about slowing down, dropping into stillness, and cultivating rest and deep relaxation. How amazing does that sound?! It IS amazing and a much-needed practice in our lives.

Restorative postures are held for a longer time than you may expect. Poses are often held for 5+ minutes each. Your body is supported in the restorative yoga postures, often with several props to be able to “drop-in.” To be able to surrender and let go of all the mental, emotional and physical stresses of life. In my class, we will stay in the poses for approximately 2 minutes each to give you a taste of restorative yoga in a ~30-minute class.
Props are used to support the body when executing restorative yoga postures to encourage the muscles of the body to relax. Many of the postures are held almost effortlessly. In some of the restorative yoga postures, you will receive a gentle stretch (e.g. Bananasana). If you find you cannot relax your body in a pose, try using all of the props suggested for the pose.
The real “work” in restorative yoga is to find what works to make your body the most comfortable. Also, to pay attention to your breathing and become aware of body sensations and thoughts that arise during the practice.
What props are recommended for the practice?
Props really are a necessary part of any practice that has restorative yoga postures. When I do a restorative yoga practice I use the following props:
Yoga blankets
I frequently use up to 3 blankets at a time to support a restorative yoga posture! These blankets are durable and machine washable. They fold up and stack nicely to support the body as needed.


Yoga Blocks
I often use yoga blocks in my daily practice and I definitely use them when I am doing restorative yoga postures! Sometimes I use 3 blocks in a pose! I prefer to use foam blocks as they are softer than some other types of blocks. I use the 4 x 6 x 9-inch blocks.

Yoga Bolster
This is the bolster I use in my restorative practice. It is 24” long x 6” high x 12” wide and has a washable cotton cover. It is firm and supports the body well in restorative yoga postures, much better than regular cushions or pillows. I highly recommend having a bolster to use.

In some restorative classes, I have seen a smaller bolster used, such as this one. It comes in a variety of beautiful colors:

Yoga Mat
A yoga mat is a must-have item for anyone that wants to practice yoga! I prefer a mat with a little extra cushioning and I do stack a few mats if I’m on a hard floor. Here is the mat I have been using for the past few years. It has a 5 mm cushion base, is eco-friendly and mine is this lovely purple color!

Eye Pillow
An eye pillow is an optional prop to use while doing restorative yoga postures. It can deepen relaxation by eliminating extraneous light and if you choose scented eye pillows the light scent can enhance relaxation as well.

5 Restorative Yoga Postures for Stress Relief
I have developed a restorative yoga sequence that incorporates 5 asanas (poses) to lower your levels of cortisol and calm your nervous system. In this section, I will give information about the benefits of the poses and how to execute each pose. Near the end of the post, I have included a video class of this sequence. The Sanskrit name for each pose is provided in parentheses.
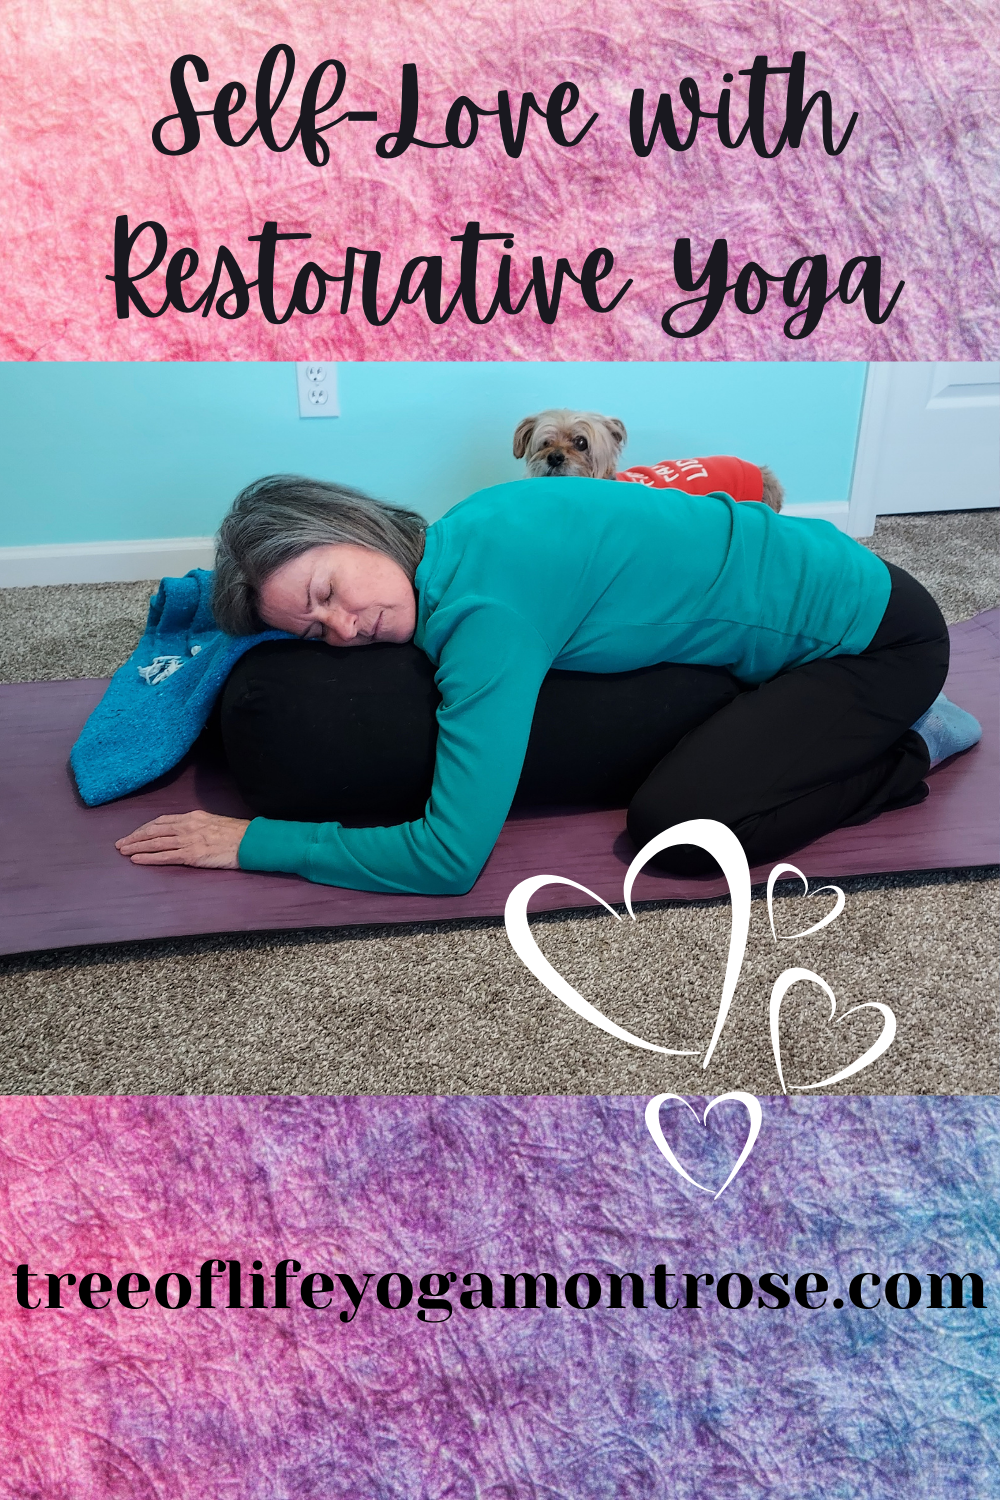
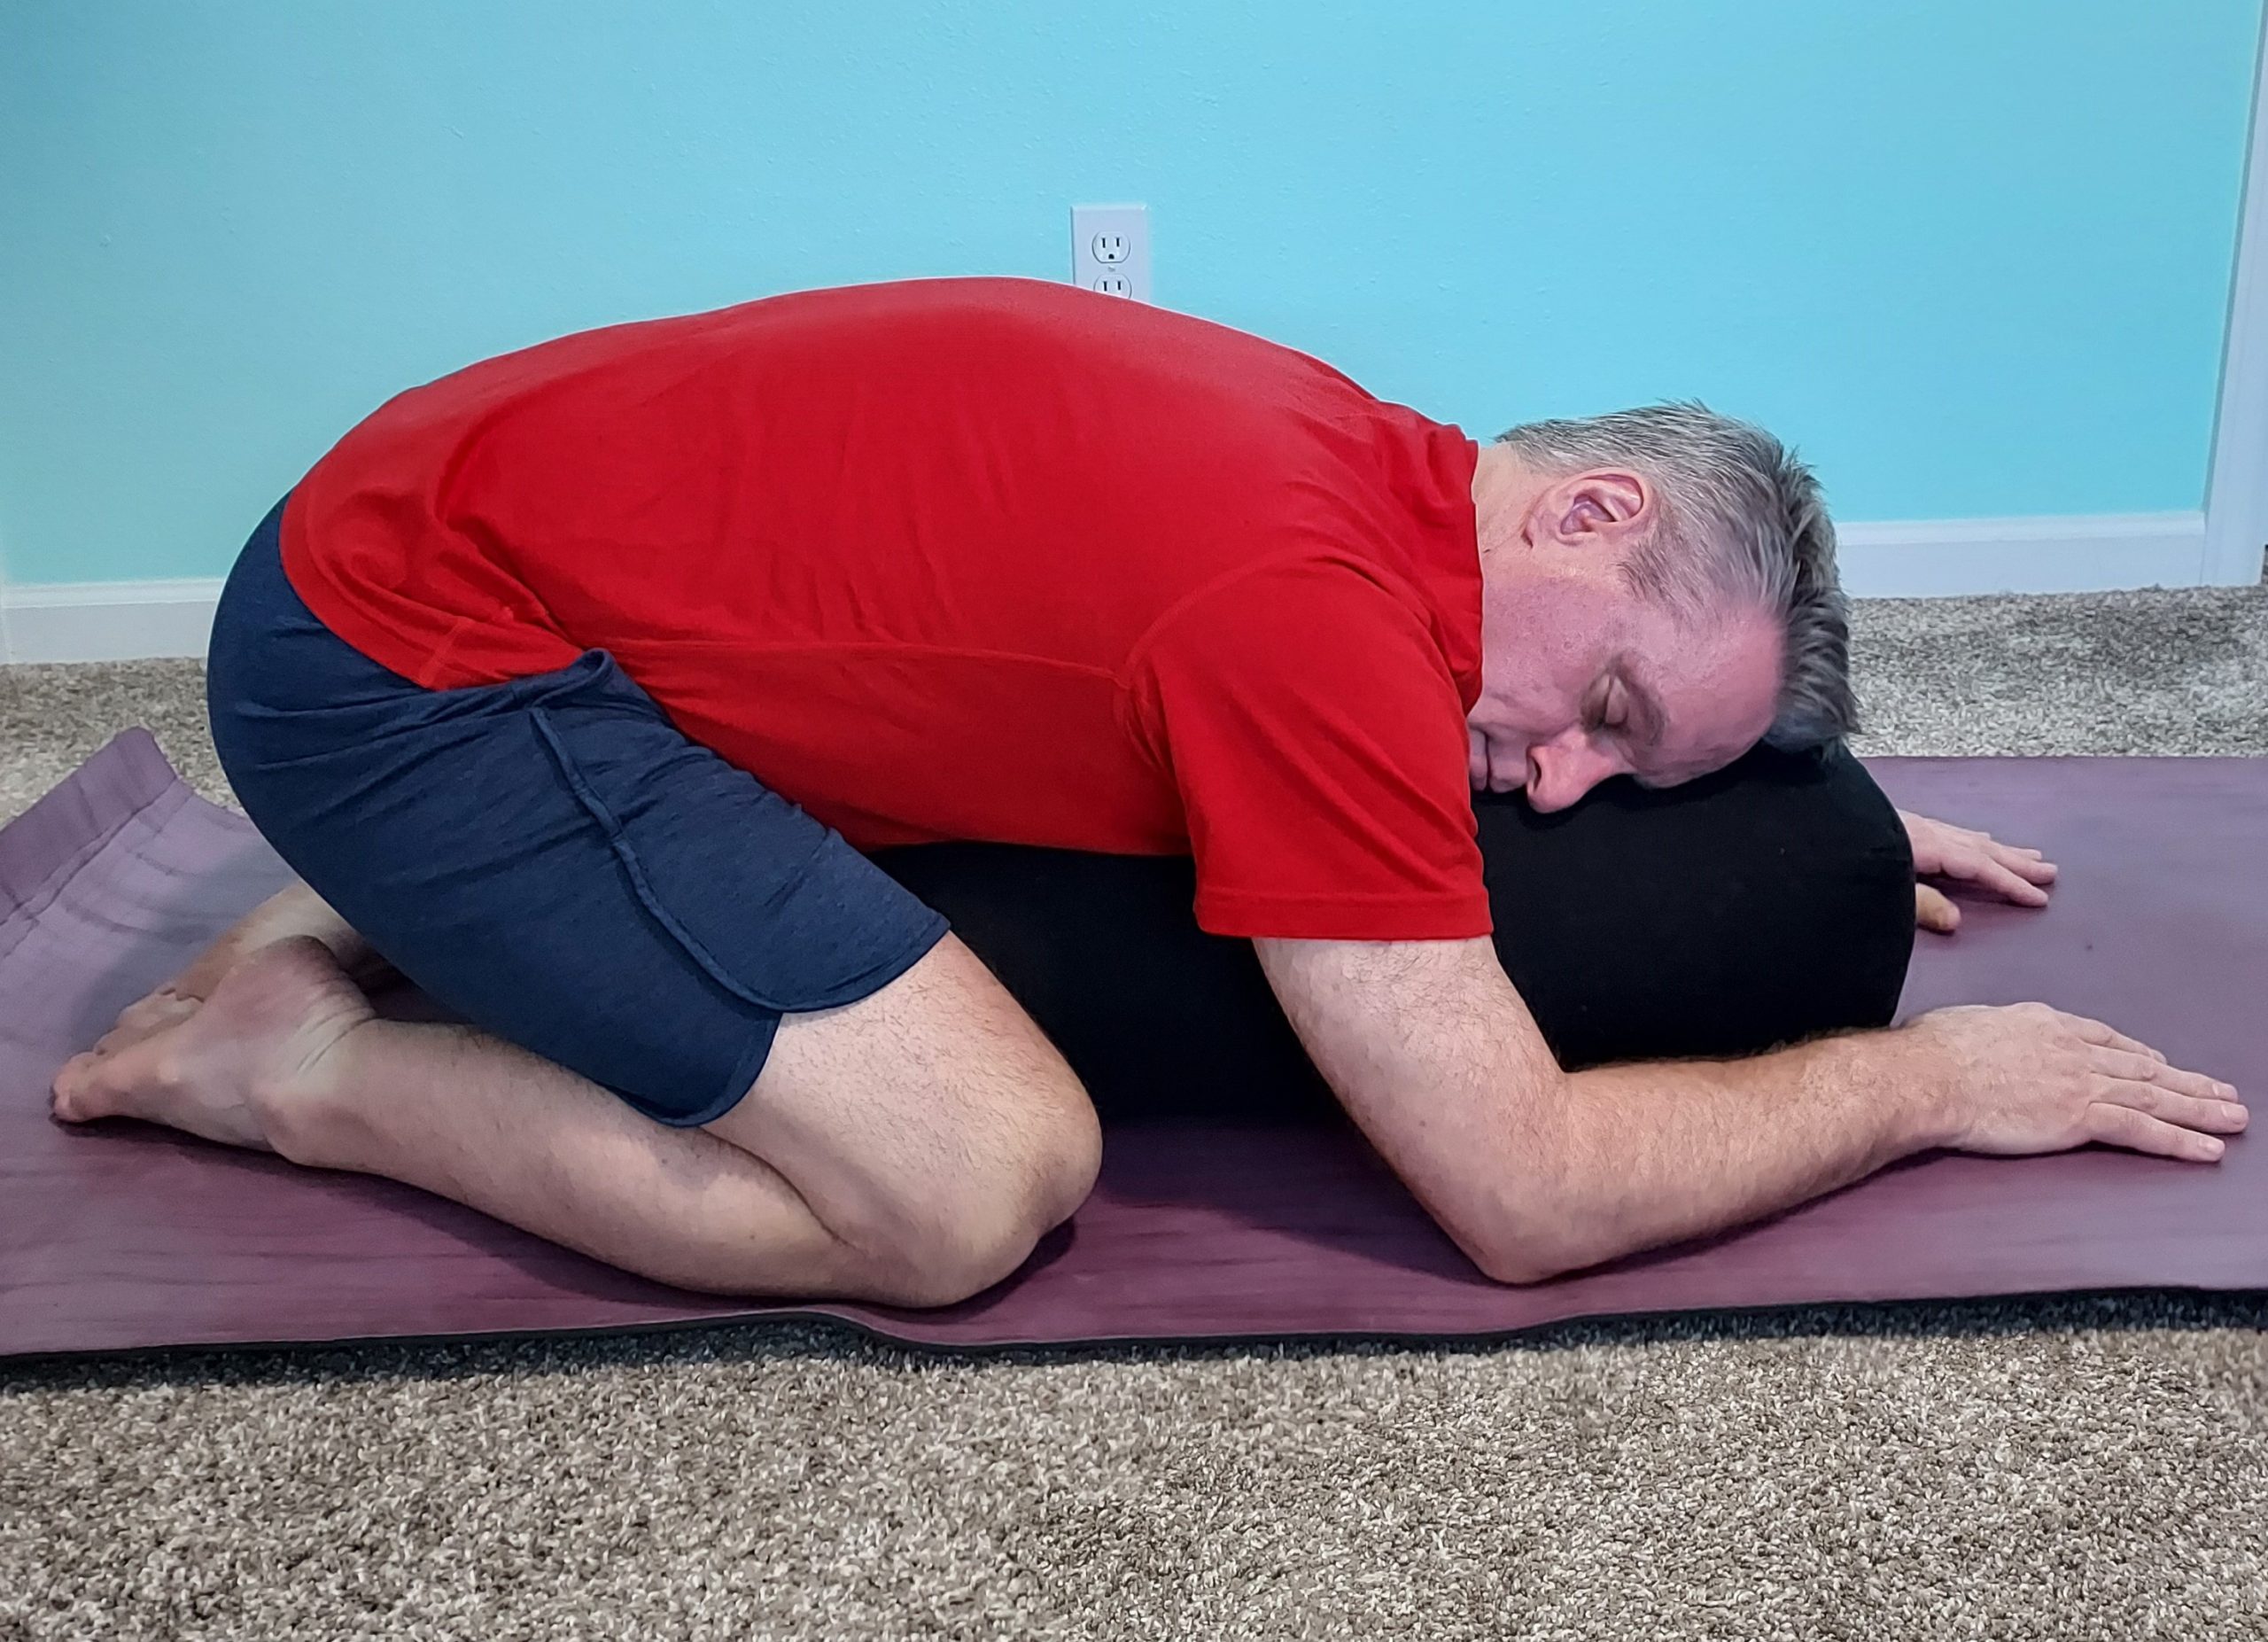
1. Child’s Pose (Balasana) or Devotional Pose (Bhaktasana)
Benefits:
- gentle stretch for the spine, back, hips, thighs and ankles
- relieves back pain
- relieves tension in the chest, shoulders, lower back and hamstrings
- relaxing
- calms and soothes the brain
- reduces stress and fatigue
Step by step instructions:
- Come onto all fours in table position. Take the knees wide with the big toes to touch. Bring your bolster between the knees lengthwise on your yoga mat.
- Inhale and lengthen the spine, exhale roll your torso down onto the bolster. Turn your head to one side.
- Bend the arms at the elbows and let the arms rest comfortably beside the bolster.
- Relax here for 2-3 minutes, focusing on the breath. Feel the back body fill up with air.
- Repeat with the head turned to the other
- Repeat on the other side, making a slow transition to the other side. Remain here for 2-3 minutes, relaxing, breathing consciously, noticing the sensations in your body and your thoughts.
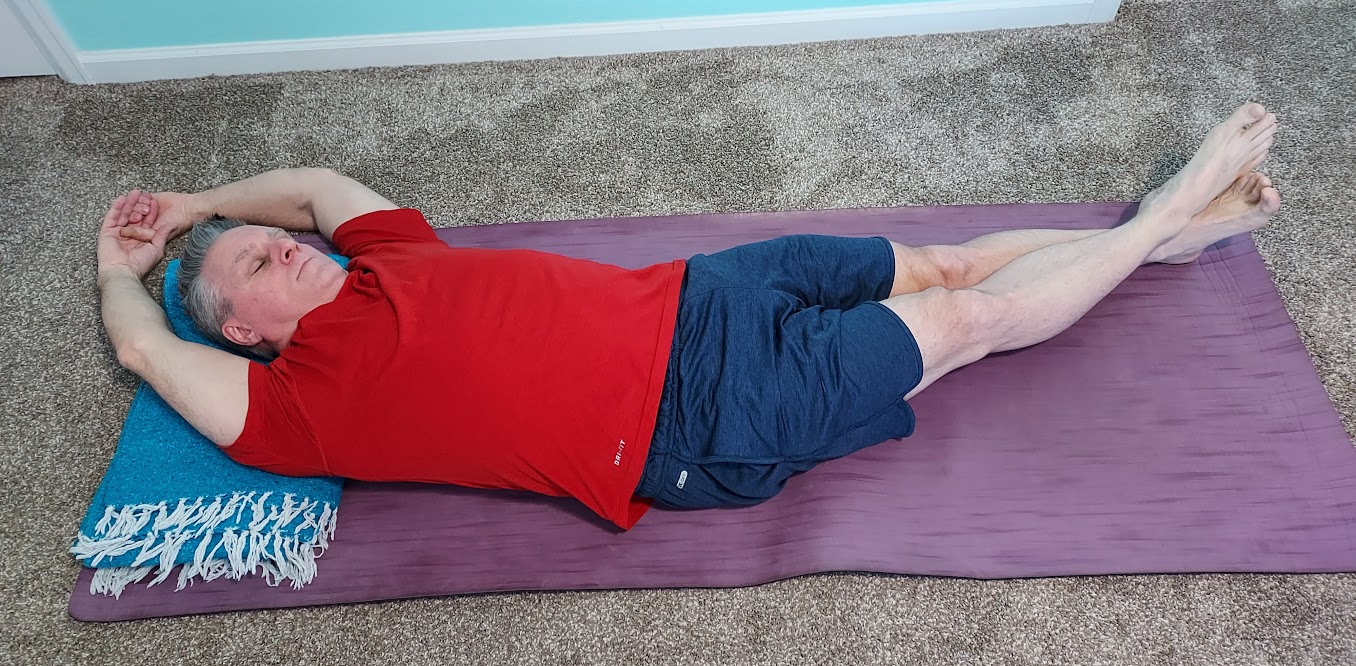
2. Banana Pose (Bananasana)
As this is a restorative class, we want to come into a gentle, comfortable side stretch. You want to be able to relax and surrender.
Benefits:
- releases tension and stretches the obliques and intercostal muscles (between the ribs)
- opens hip joints
- releases tension in pelvis
- relaxes muscles
- releases tension in muscles along the spine
- opens the entire side body
- calming pose
- stretches IT (iliotibial) band
- opens gall bladder meridian
Step by step instructions:
- Lie down on your back on your mat. Reach your arms overhead.
- Keep your legs straight, walk both legs to the far right side of your mat. Keep both sit bones on the floor. You can cross the left ankle over the right or not.
- Scoot the upper body toward the right side of the mat, bringing your body into the shape of a banana. Keep both shoulders down on the mat.
- Ground the body down into the mat, consciously relaxing your entire body, feeling a gentle stretch along the side body. Stay for 2 minutes.
- Repeat on the other side.
Contraindications/Modifications:
- If you feel tingling in the arms when they are overhead, place a folded blanket or bolster under the arms, or cactus the arms/bring arms to the sides.
- If you have lower back issues, do not go too deep into the pose. Keep it gentle.
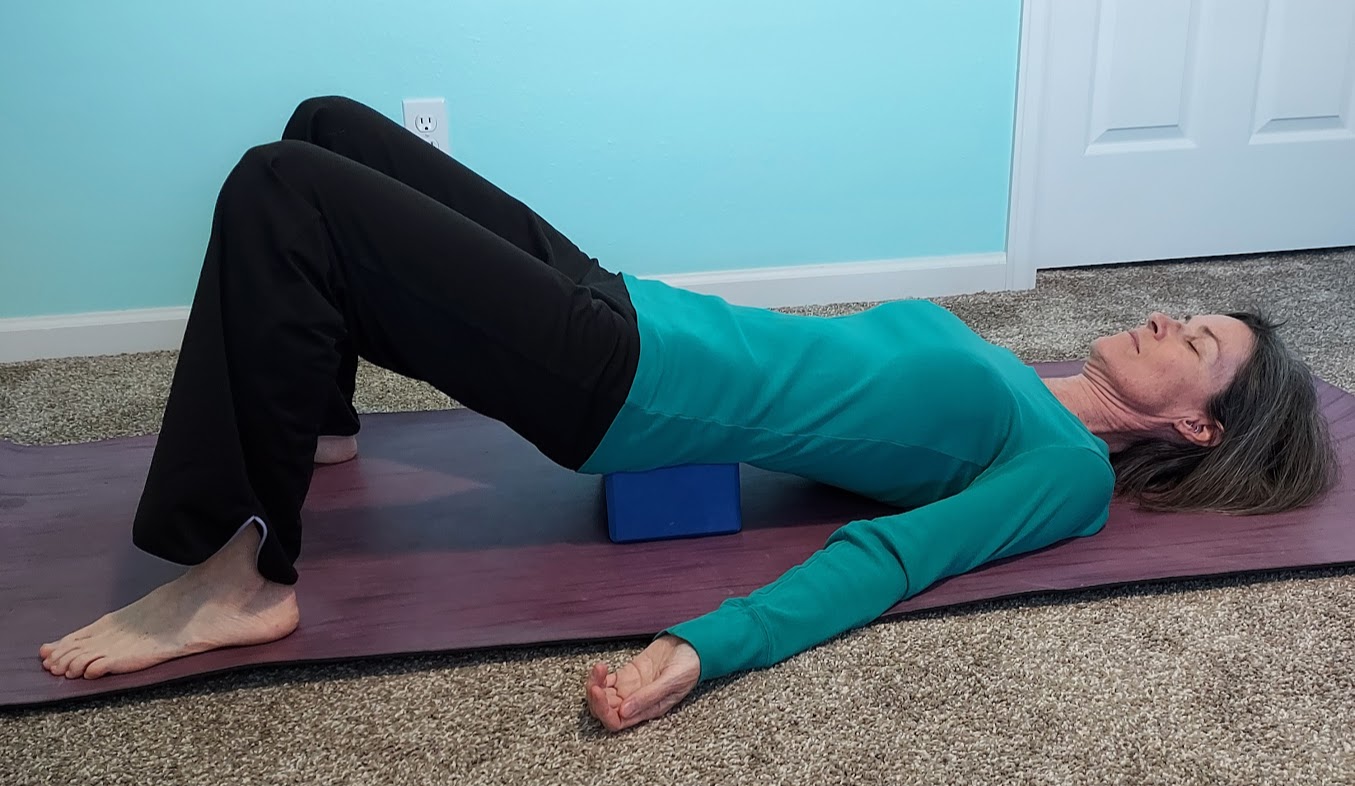
3. Supported Bridge Pose (Setu Bandha Sarvangasana)
Benefits:
- Headache relief
- Encourages deep relaxation
- Soothes the nervous system
- Lessens anxiety and mild depression
- Improves digestion, circulation and respiration
- Calms the brain
- Nourishes women’s health through all life stages (menstruation, pregnancy*, menopause, post-menopause) * unless you feel nausea/dizziness on your back
Step by step instructions:
- Lie on your back on your yoga mat, knees bent, feet on the floor. Bring your heels close to your hips, feet hip-width distance apart. Arms are alongside the body.
- Press into the feet and lift the hips up off the floor. Slide a block underneath the body in the area of the waistband of the pants. The block has three heights. Only use the lower two heights for the restorative version of this pose (4″ or 6″ height). Place the block so it feels sturdy and supports the weight of your body.
- Step the feet further apart now so the legs can relax and you do not have to put much effort into holding them in position.
- Let your body relax into the pose. Arms can rest alongside the body with the palms up.
- Stay here for 2-5 minutes, focusing on the breath, body sensations, and thoughts.
- When you are ready to come out of the pose, walk the feet back into a hip-width distance apart. Press into the feet and lift the hips, remove the block and roll down through the back.
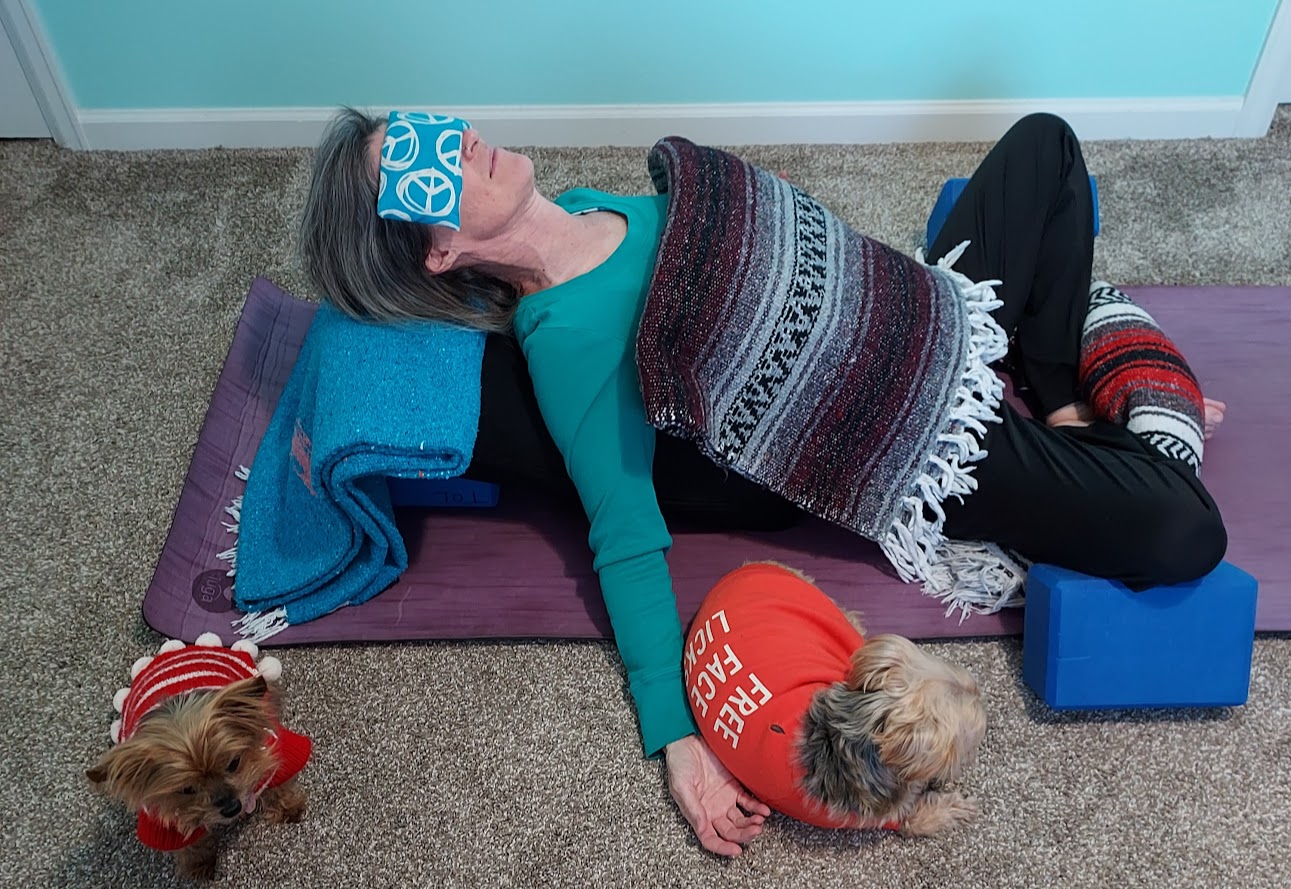
4. Reclined Butterfly Pose, Reclined Bound Angle Pose, Reclined Goddess Pose (Supta Baddha Konasana)
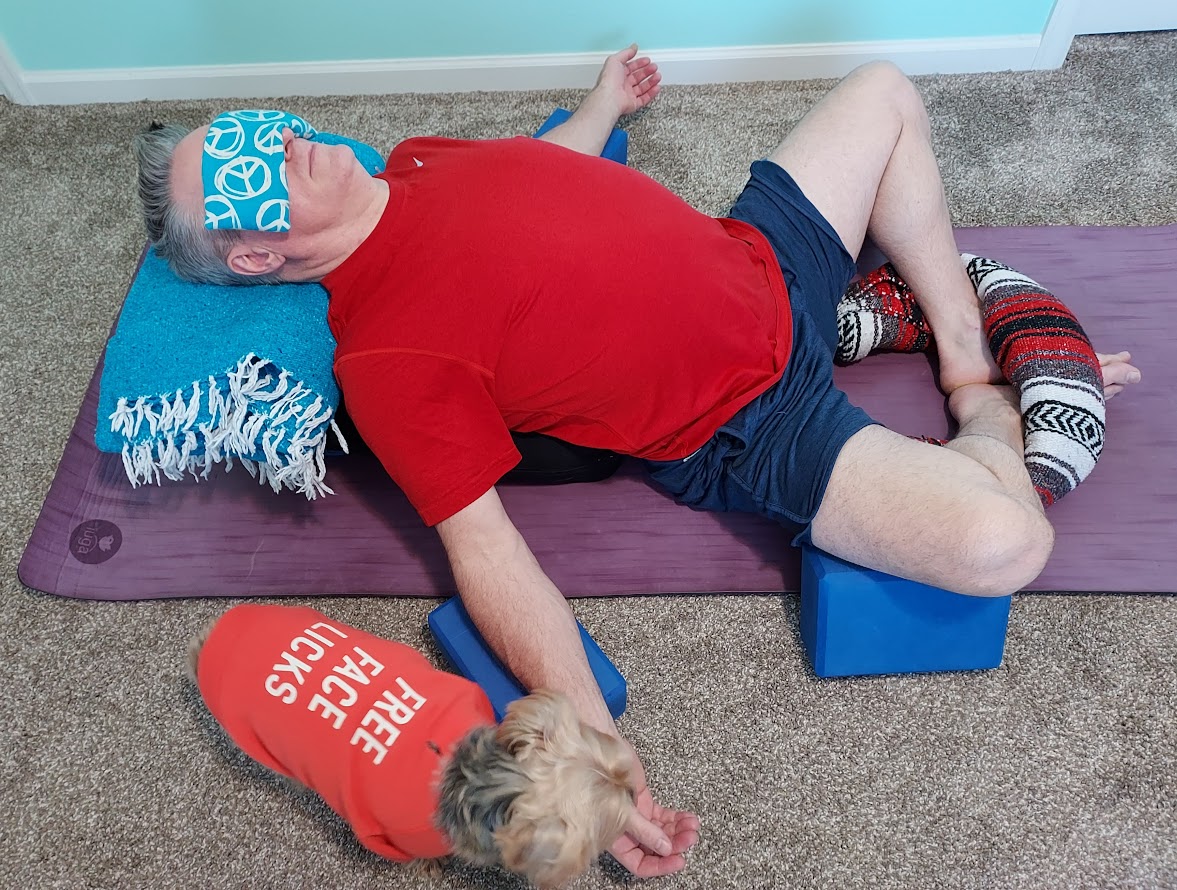
Use props in this pose to be able to relax and surrender completely.
Benefits:
- Reduces stress and calms the mind
- Gentle stretch for the groins, hips, knees, and thighs
- Gentle chest opener
- Offers relief from menstrual discomfort and menopause symptoms
- Increases mobility on the hips
- Stimulates the abdominal organs
Step by step instructions:
- Collect props to use for this supported version of the pose: bolster, blankets (2), blocks (2).
- Place the bolster lengthwise on the mat. Sit with your lower back up against the bolster.
- Take your blanket and roll it up into a long, noodle-like shape to make a long blanket roll.
- Bring the bottoms of your feet together, knees bent, knees wide.
- Place the blanket roll on top of your feet and tuck the ends of the blanket under the thighs, giving support.
- Roll down onto the bolster and tuck the shoulders in toward each other slightly, opening the chest.
- Relax fully into the pose. Releasing any holding in any parts of the body. Focus on your breathing, any bodily sensations and notice the thoughts that come and go.
Variations:
If it would make the pose more comfortable use the blocks under the knees/thighs for additional support. The blocks can also be used under the forearms, as armrests. It can bring more comfort to place a folded blanket on the bolster, under the head.
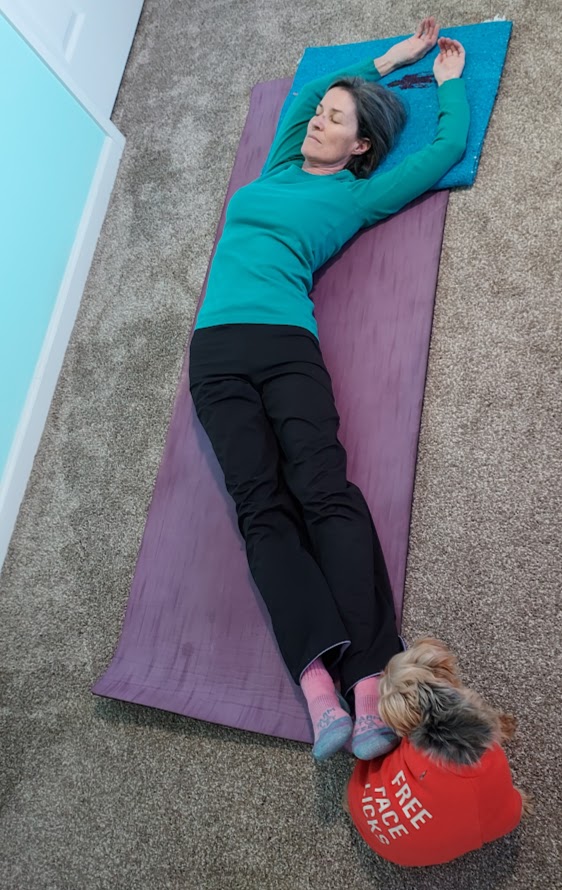
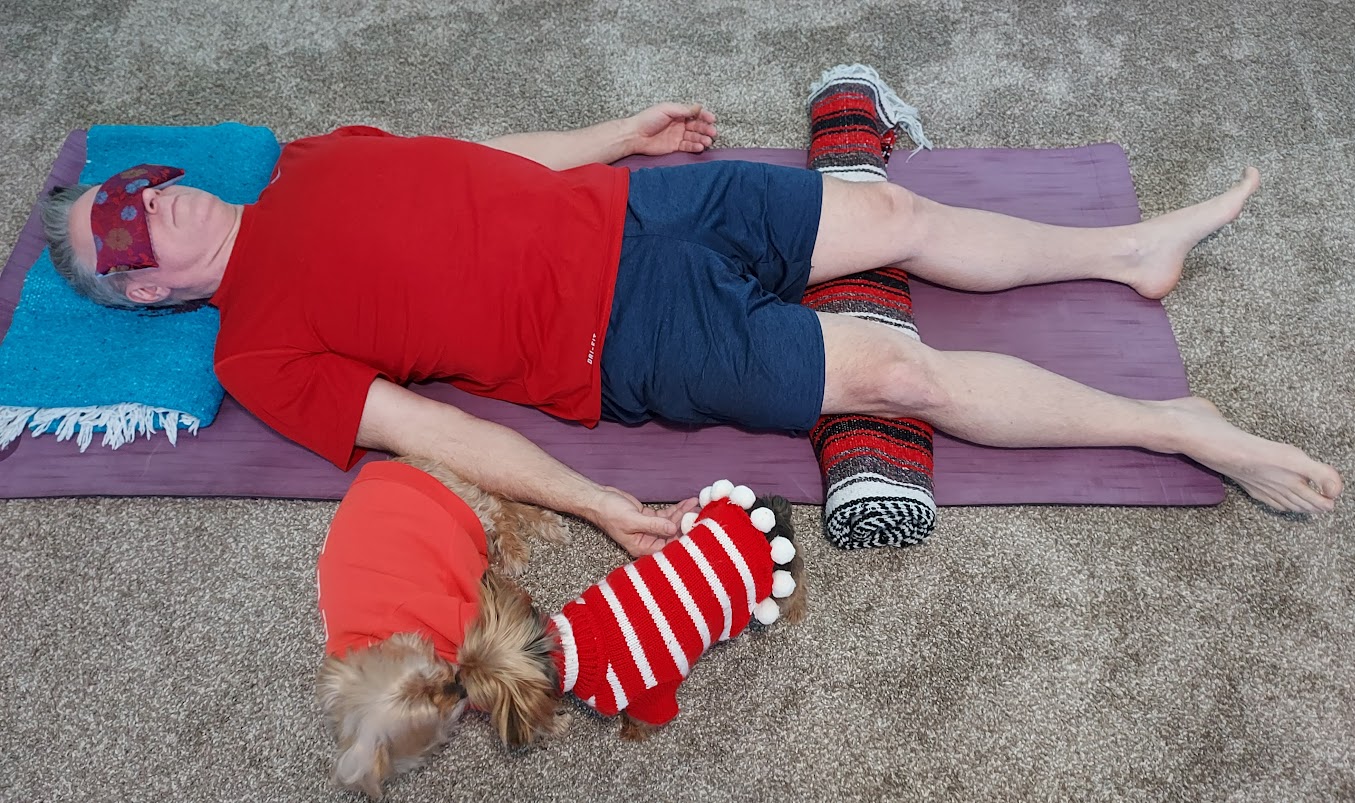
5. Corpse Pose, (Savasana)
Savasana is said to be the most important of all the yoga poses. I have dedicated an entire post to this pose. Check it out here.
Benefits:
- releases muscular tension in the body
- relieves stress
- lowers blood pressure
- calms the nervous system by activating the parasympathetic nervous system (rest and digest response)
- brings the mind and body into a meditative state
Step by step instructions:
- Come to lie on your back on your yoga mat. Let the legs fall open and relax. Position the legs about as far apart as the width of the mat.
- The arms are at your sides, away from the body with the palms up. Let the fingers curl up as you relax the hands.
- Bring the shoulder blades in toward each other and slide them down the back. You will find this helps the shoulders to lie more flat on the mat.
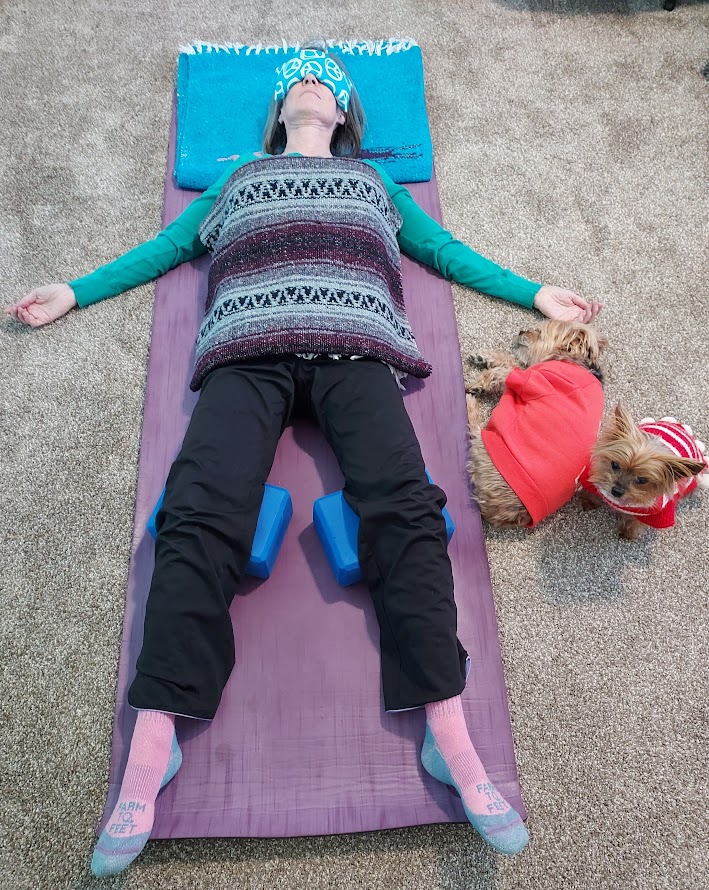
Use props to make your savasana even more comfortable. In order to be able to relax and surrender you need to be as comfortable as possible. Props can help you find more ease in the pose. Here are a few suggestions for how to use a few standard props:
- Blankets – If the floor is chilly, place a blanket underneath your body. Cover up with a blanket for warmth and security. Place a folded blanket over the abdomen. Place a folded blanket under the head. Ideally, the forehead should be slightly higher than the chin. Roll up a blanket and place it under the knees, this can be helpful for low back tension. I frequently use several, as can be seen in the pictures!
- Eye Pillow – Place an eye pillow over the eyes to decrease light distractions. The weight/scent/temperature of the eye pillow can be soothing. They can be heated to bring an even more serene experience. When teaching, I heat eye pillows on a heating pad during class so they are ready for students to use during Savasana.
- Blocks – Blocks can be placed under the knees.
Give yourself the ultimate gift of self-love. Join me in this 30-minute Restorative Yoga for Stress Relief Class! Subscribe to my YouTube channel for more yoga content!!


Catia
December 24, 2022 5:45 amI didn’t know about restorative yoga! This was incredibly informative – I wish I had a yoga studio near me for an in-person experience. Living further from the city really limits the amenities around (but I wouldn’t change it!) Having videos and step-by-step instructions like these are so helpful – thank you.
Julie
December 24, 2022 5:43 pmThank you Catia! Check out my post reviewing YogaDownload, my favorite online yoga platform! It’s amazing! I do 4-5 classes a week right in the comfort of my home!
Lindsey
December 23, 2022 5:03 pmI have found yoga helpful in my migraine journey and this is right up there for my best stress relief. Thank you for sharing.
Julie
December 24, 2022 5:44 pmYoga is definitely my top go-to for stress relief!
Fransic verso
December 23, 2022 4:07 pmThese are awesome tips and things for people who want to do Yoga at home. Thank you for sharing these tips!
Julie
December 23, 2022 4:09 pmYou’re welcome 🙂 Thanks for stopping by!
Michelle Latinovich
December 23, 2022 1:43 pmI keep saying I need to get started in yoga. I love the idea of restorative yoga and holding poses longer. Would you recommend these as a good starting point? I love how you gave details on how each yoga pose helps with different parts of your body. Thank you!
Julie
December 23, 2022 3:44 pmRestorative yoga is a very specific kind of super gentle yoga. There is basically no efforting and it is meant to be totally relaxing and helpful for stress relief and totally letting go! I myself LOVE restorative yoga. If you are looking for a relaxing type of yoga this is an excellent place to start!
Deanna | Life By Deanna
December 23, 2022 10:42 amThis was super helpful! Thanks for sharing 🙂
Julie
December 23, 2022 3:45 pmYou’re welcome 🙂 Thank you for stopping by!
Adriane
February 18, 2022 8:19 pmI have never seen stretches done with so many props. So interesting!
Julie
February 21, 2022 6:45 pmIt’s not as much about the stretching as it is surrendering!
Martina
February 16, 2022 6:05 pmI find this really informative and insightful. I will definitely try this! I honestly have never tried doing yoga before. Restorative yoga feels like the perfect thing for me now. Thanks for sharing!
Julie
February 17, 2022 12:38 pmThe ultimate self-nourishing practice!
Nishtha
February 15, 2022 9:27 pmLove this ! Will def try few of them, have to really be consistent with yoga. Thank you for the great share
Julie
February 17, 2022 12:39 pmGreat Nishtha! An awesome self-love practice!
Kristina Daugherty
February 14, 2022 11:37 amoh yes! we all need this! what a great reference, thank you for sharing this with the world!
Julie
February 14, 2022 2:29 pmThank YOU for reading and commenting! Feel free to share! 🙂
Jenn
February 14, 2022 10:47 amSo many excellent poses! Thanks for sharing this, will be saving for later as I suffer from migraines and some of these restorative poses will probably help with that.
Julie
February 14, 2022 2:30 pmThanks Jenn! I do have another post all about poses for headache relief too!
Alejandra
February 13, 2022 11:12 amYoga seems so relaxing.
Julie
February 13, 2022 7:50 pmRestorative yoga is THE ultimate relaxation practice!!
Karen Kasberg
February 13, 2022 10:20 amI absolutely love restorative yoga. It’s been a minute since I’ve attended a class and seriously need to get back to it. It is so healing. Thanks for the play-by-play on techniques. This is great!!
Julie
February 13, 2022 7:53 pmHealing is the perfect word to describe restorative yoga!
Thank you!
Michelle
February 13, 2022 10:14 amOh man, I could definitely use more of these in my daily life! Thanks for sharing 🙂
Julie
February 13, 2022 7:54 pmYou’re welcome! The perfect antidote for stress!
Isa A
February 12, 2022 10:57 amI loved the post. Every word of it. I don’t think I’m keen on the props. The thickest pptipm can also be a pillow and such covers and blankets etc can be taken from home. But i knew all postures, just never did them for long and reading about their benefits. I’m going to try doing them all now. Thanks for the details xx
Isa A. Blogger
https://www.lifestyleprism.com/
Julie
February 12, 2022 7:25 pmThank you Isa! The props can really be supportive in the poses to let your body really relax and surrender. 🙂
Sharon
February 11, 2022 7:38 pmWhat a wonderful walk-through of how restorative yoga can help with everything from headaches to just creating a sense of calm. Thank you!
Julie
February 11, 2022 9:32 pmYou’re welcome! Thank you for reading! 🙂
dorry lyn
February 11, 2022 4:09 pmyeah, working out like this is truly relaxing
Julie
February 11, 2022 9:33 pmA great release for the mind and body!
Sharon Gaza
February 11, 2022 3:24 pmGreat information! I need to incorporate these in my life.
Julie
February 11, 2022 9:33 pmA great practice to totally surrender and deeply relax the mind and body! 🙂
Tisha
February 11, 2022 2:05 pmThese all look like heavenly poses to relieve the stress!
Julie
February 11, 2022 3:00 pmIndeed they are!!
Mel
February 11, 2022 10:58 amI love restorative yoga! it’s helped me so much with my mental energy too
Julie
February 11, 2022 3:01 pmSo many wonderful benefits from the practice!
Kelli Pease
February 11, 2022 10:27 amJulie, thank you so much for sharing this. I do restorative yoga once a week and since the pandemic, I’ve started doing it at home. A few of these postures are new to me and I can’t wait to add them to my practice!
Julie
February 11, 2022 3:02 pmThat’s great Kelli! I love practicing at home!
Jaclyn
February 11, 2022 10:15 amThese look so cozy and just perfect for the end of the week! Thanks for the reminder to slow down.
Julie
February 11, 2022 3:02 pmA perfect practice to wind down at the end of the week!
Nadalie Bardo
February 11, 2022 8:29 amThese look really good! I feel relieved by just looking at these positions! Will try this soon…
Julie
February 11, 2022 3:03 pmExcellent Nadalie! A great way to relieve stress 🙂
Krystal
February 11, 2022 7:32 amThese are great tips!! Something I def want to incorporate in my life!!
Julie
February 11, 2022 3:04 pmWe all need a way to reduce stress in our lives!
Prerna
February 11, 2022 2:35 amThanks for sharing these important tips for doing restorative yoga. This will be very helpful at thr end of the day. I will try to follow all these steps.
Julie
February 11, 2022 3:05 pmA great stress-relieving practice to nurture yourself!
Amber Myers
February 10, 2022 4:08 pmI wish I could get into Yoga. I tend to like going for walks when I am stressed. It helps a ton!
Julie
February 11, 2022 3:06 pmI love going for walks too. I use both for stress relief!
Heather
February 10, 2022 3:17 pmI haven’t heard of restorative yoga, but it looks like something that would be good for me and my stress levels.
Julie
February 11, 2022 3:07 pmIt’s a great way to relieve stress and nurture oneself!
Briana Baker
February 10, 2022 5:08 amI just started adding some yoga and static stretching into my workout and it has been doing wonders! Thanks for the inspiration!
Julie
February 10, 2022 1:43 pmYou’re welcome! Thanks for reading! 🙂